Do you find yourself tearing your hair over ISDone.dll while installing a beloved game? Such issues are common with large software installations, especially those entrusted with huge file sizes. In this comprehensive guide, we provide the reader with several different troubleshooting steps to rectify ISDone.dll errors and an in-depth dissertation on why it happens in the first place.
Why Does the Error Occur?
ISDone.dll errors are typically not due to the app itself but may arise out of trouble within the PC. One common cause is the lack of system resources, particularly RAM or available storage resource during the installation process. More precisely, these errors occur when Windows attempts to extract some large-sized installation files within system memory, but insufficient resources hamper this operation. The ISDone.dll is a dynamic link library (DLL) that deals with decompressing large compressed installation files. If the system does not possess sufficient resources-whether it be less RAM or a cluttered hard drive- the installation might fail and trigger the ISDone.dll error.
- Insufficient RAM: Games often consist of big files requiring substantial system memory for unpacking and installation. If there is insufficient RAM present in the system, the unpacking process fails which triggers the error.
- Lack of Available Disk Space: If there is enough RAM but not enough space on your computer’s hard disk for temporary files to be created for this installation process, the installation can run into problems.
- Corrupted ISDone.dll or Unarc.dll Files: These missing or corrupted system files could be directly responsible for the error, which are required for handling installations of games.
- Conflicts in the System: Any background program conflicts, such as an antivirus or any unrequired processes, can cause problems with the installation process.
- Corrupt System Files: Instances of Windows system files getting corrupted would also deny the installer to work correctly and pose such errors like ISDone.dll.
- Outdated Software or Visual C++ Redistributables: The installer is likely relying on certain software or libraries-most probably Visual C++ Redistributables-to successfully install. The lack of or outdated versions may lead to an ISDone DLL error.
Having gone through this, we are now in a position to give you top 12 effective methods to try to fix the ISDone.dll error message that pops when you are in the middle of a game installation.
12 Simple Steps to Fix ISDone.dll and Unarc.dll Error
Step 1: Replace ISDone.dll and Unarc.dll Files
If you suspect that your ISDone.dll or Unarc.dll files are outdated or corrupted, replacing them with the latest versions can help resolve the issue. Follow these detailed instructions:
Visit a Trusted DLL Website:
Go to DLLMe.com (or another trusted source) to obtain the latest versions of the DLL files.
- Download ISDone.dll From DllMe.com
- Download Unarc.dll From DllMe.com
Download the Latest Version:
- Locate the download links for ISDone.dll and Unarc.dll.
- Click on the download link for each file.
- Ensure you select the “latest version” option when prompted.
Extract the Downloaded Files:
Once downloaded, extract the compressed files using an extraction tool like WinRAR or 7-Zip.
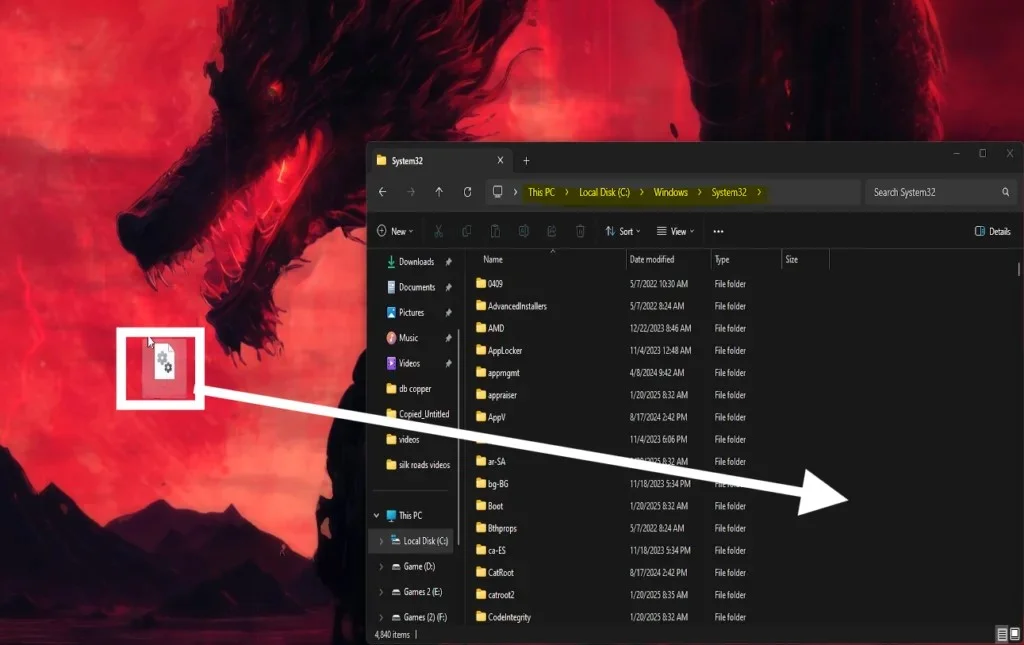
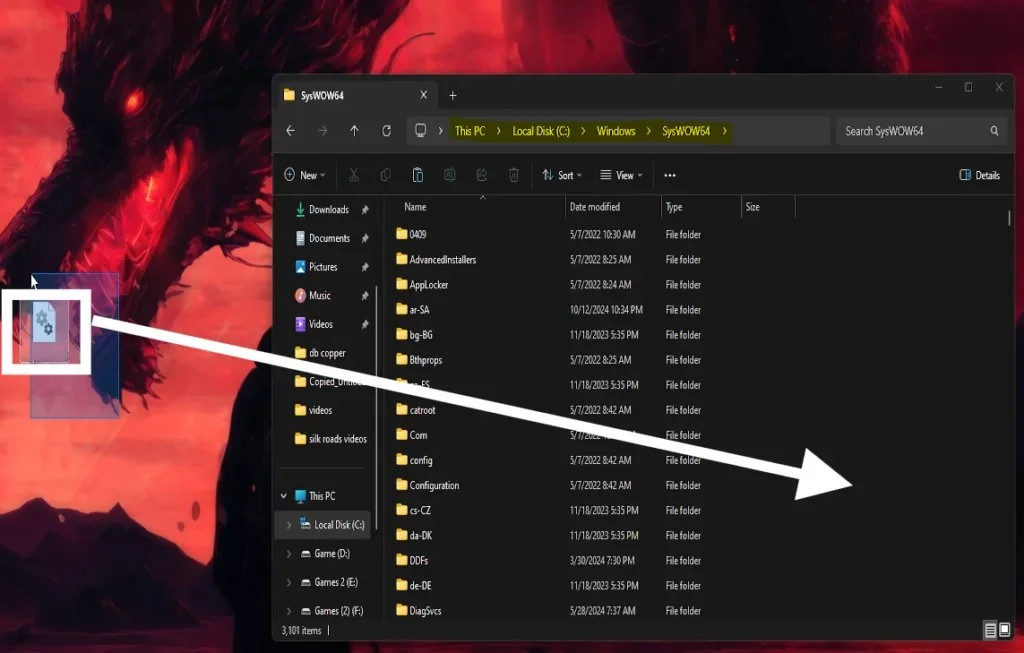
Replace the DLL Files:
- Navigate to the C:\Windows\System32 folder.
- Drag and drop the newly extracted ISDone.dll and Unarc.dll files into the folder.
- If you are on a 64-bit system, also copy these files into C:\Windows\SysWOW64.
Re-Register the DLL Files (see Step 2):
After copying, you’ll need to re-register these files with Windows (instructions in the next step).
Step 2: Re-Register the ISDone.dll and Unarc.dll Files
After replacing the DLL files, re-registering them can confirm that Windows properly loads them during the installation process.
How to re-register:
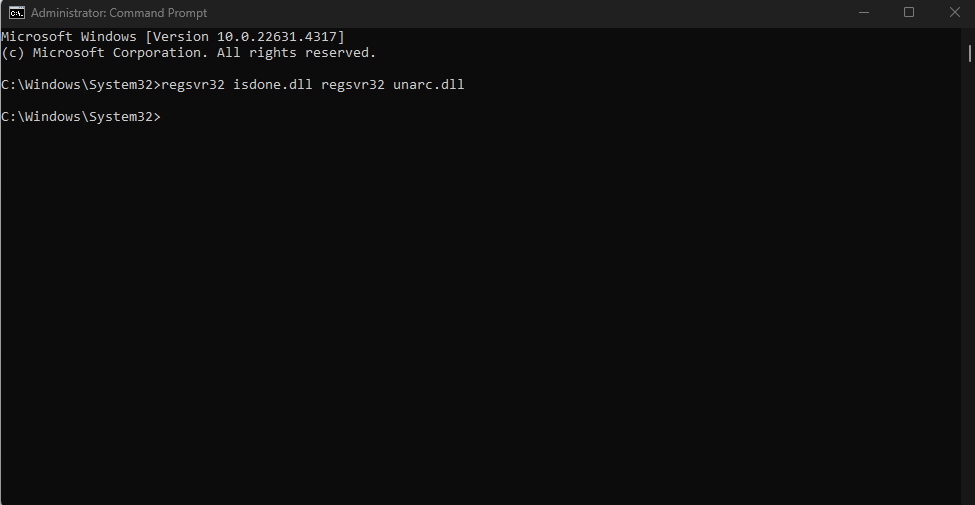
- Open Command Prompt as Administrator:
- Click on the Start menu, type cmd, right-click on Command Prompt, and select Run as administrator.
- Run the Registration Commands:
In the command prompt window, type the following commands and press Enter after each:nginxCopyEditregsvr32 isdone.dll regsvr32 unarc.dll - Confirmation:
You should see a message confirming that the DLL files were registered successfully.
Step 3: Install Missing Visual C++ Redistributables
Missing or outdated Visual C++ Redistributable packages can cause game installers to fail. Installing these redistributables can often fix errors related to ISDone.dll.
Steps to install:
1. Visit Microsoft’s Official Website:
Go to the Microsoft Download Center.
2. Download the Required Packages:
- Download the latest versions of both the x86 and x64 packages.
- Additionally, consider installing older versions (such as those from 2012 and 2013) if you’re installing an older game.
3. Install the Packages:
Run the installers for each package and follow the on-screen instructions.
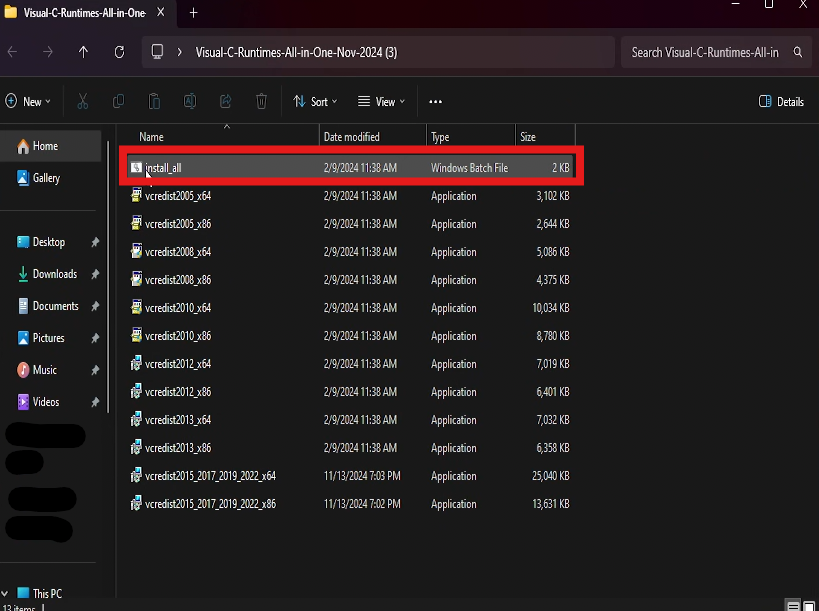
Alternatively Download All In One From TechPowerUp
How to Download:
- Visit TechPowerUp’s Visual C++ Redistributable All-in-One package.
- Choose the version based on your system’s architecture (x86 for 32-bit systems, x64 for 64-bit systems).

Installation Instructions:
- Download the all-in-one package and extract it to a folder.
- Inside the folder, run the
.batfile to install all required redistributables in one go. - Wait for the installation process to complete (You should click “Yes” whenever the window appears so that the installation can proceed), then reboot your system if prompted.
You May Like: How To Download All Runtime Files and Software 2025
Step 4: Run System File and Image Scans
Corrupted system files can lead to many errors, including the ISDone.dll error. Running system scans with built-in tools can help identify and repair these issues.
How to run the scans:
- Open Command Prompt as Administrator:
Search for cmd in the Start menu, right-click on Command Prompt, and choose Run as administrator. - Run the System File Checker:
Type the following command and press Enter:bashCopyEditsfc /scannowAllow the scan to complete. This tool will search for and fix any corrupted system files. - Use the DISM Tool (if needed):
If the problem persists after running SFC, type the following commands (one at a time), pressing Enter after each:swiftCopyEditDISM /Online /Cleanup-Image /ScanHealth DISM /Online /Cleanup-Image /RestoreHealth - Restart Your Computer:
Once the repairs are complete, restart your PC to ensure all changes take effect.
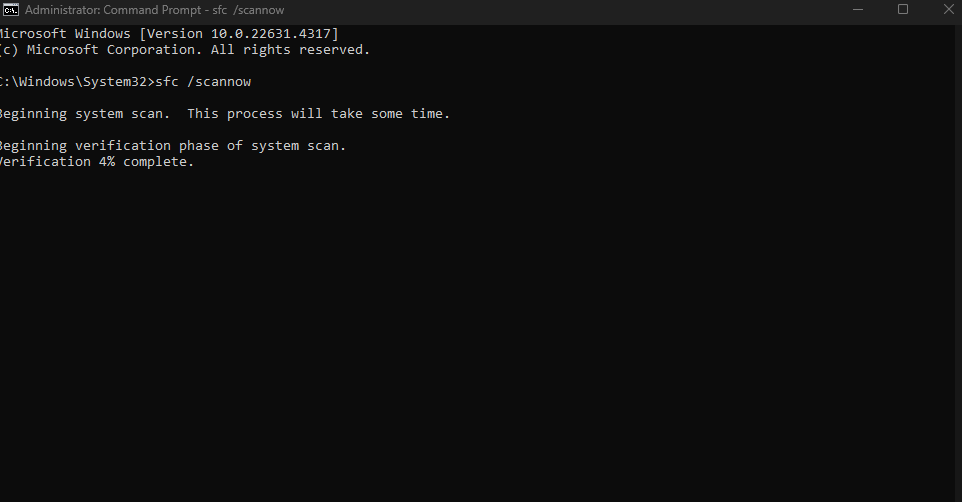
sfc /scannow and press Enter.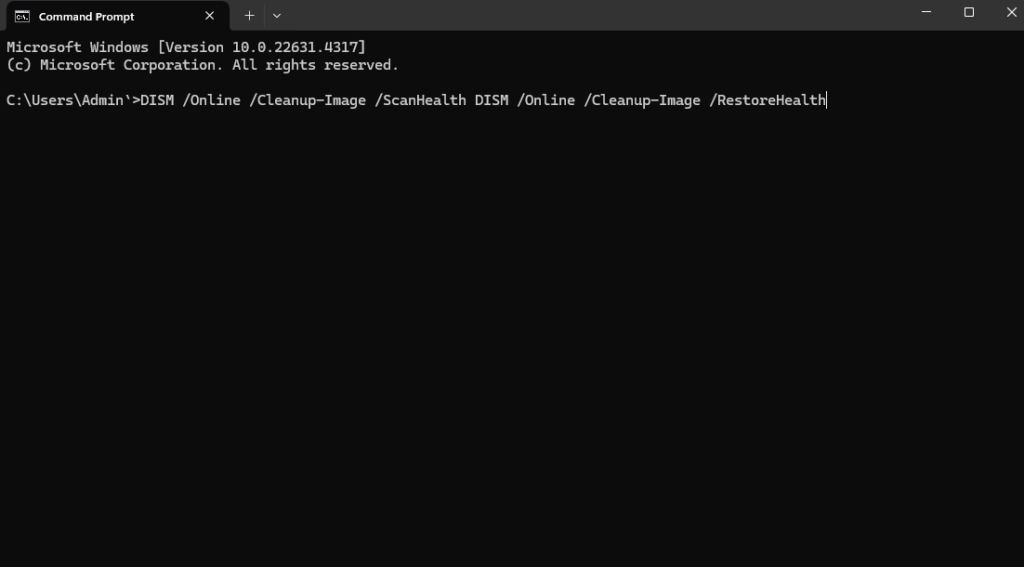
DISM /Online /Cleanup-Image /ScanHealth DISM /Online /Cleanup-Image /RestoreHealth May Not Work On Windows 11 use this instead DISM /Online /Cleanup-image /RestoreHealthStep 5: Increase Virtual Memory Allocation
When installing large games, your system may run out of physical memory (RAM). Increasing the virtual memory (paging file) can help provide additional resources for the installation process.
How to increase virtual memory:
Access System Properties:
- Right-click This PC or My Computer and select Properties.
- Click on Advanced system settings.
Adjust Performance Settings:
In the Performance section, click on Settings.
Configure Virtual Memory:
- Navigate to the Advanced tab and click on Change under Virtual Memory.
- Uncheck Automatically manage paging file size for all drives.
- Set a Custom size:
- Initial size: Multiply your total RAM by 1.5.
- Maximum size: Multiply your total RAM by 3.
- Click Set and then OK.
Step 6: Temporarily Disable Antivirus
Sometimes, antivirus software mistakenly blocks parts of the installation process. Disabling your antivirus temporarily can allow the installer to run without interference.
Steps:
- Locate Your Antivirus Icon:
Find the antivirus icon in your system tray (usually in the bottom-right corner of your screen). - Disable Antivirus:
Right-click the icon and choose the option to disable or pause protection temporarily. (Make sure to note how to re-enable it later.) - Run the Installer:
Proceed with the game installation. - Re-Enable Antivirus:
Once the installation is complete, re-enable your antivirus to keep your system protected.
This step ensures that no security software is inadvertently blocking the installation files.
Step 7: Perform a Clean Boot Your PC (Optional)
Background processes and services might interfere with the installation process. A clean boot starts Windows with only the essential services, minimizing potential conflicts.
1. How to perform a clean boot:
Open System Configuration:
Press Windows + R, type msconfig, and press Enter.
2. Disable Non-Essential Services:
- Go to the Services tab.
- Check Hide all Microsoft services.
- Click Disable all to turn off non-essential services.
3. Disable Startup Programs:
- Open the Startup tab (or use Task Manager for Windows 10/11).
- Disable all non-essential startup programs.
Step 8: Increase System RAM Capacity
If your system consistently runs low on RAM during intensive tasks, you might need to increase your physical memory. This step involves either freeing up current memory usage or upgrading your hardware.
How to check and free up RAM:
- Open Task Manager:
Press Ctrl + Shift + Esc to launch the Task Manager. - Check Memory Usage:
Go to the Performance tab and observe your current RAM usage. - Close Unnecessary Applications:
If the RAM usage is near 100%, close any applications that are not needed during the installation process. - Consider a Hardware Upgrade:
If you consistently experience high memory usage, consider adding more RAM to your system. Consult your PC’s manual or a professional for hardware upgrade instructions.
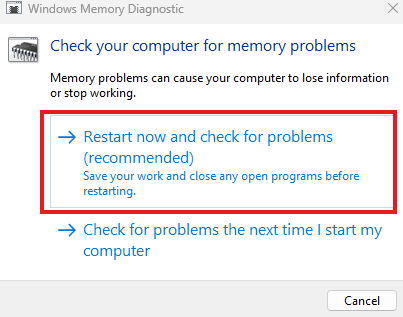
Step 9: Perform a Memory Test
Steps to run the memory diagnostic:
- Open the Windows Memory Diagnostic Tool:
Press Windows + R, type mdsched.exe, and hit Enter. - Restart and Test:
Choose the option Restart now and check for problems. Your computer will reboot and begin the memory test. - Review the Results:
Once the test is complete, Windows will display the results. If any errors are found, you may need to replace the faulty RAM.
Step 10: Use Compatibility Mode
Older games might not work properly on newer versions of Windows due to compatibility issues. Running the installer in compatibility mode can resolve these issues.
How to enable compatibility mode:
- Right-Click the Installer:
Find the game’s setup file, right-click it, and select Properties. - Enable Compatibility Mode:
Navigate to the Compatibility tab.- Check Run this program in compatibility mode for:
- Choose an earlier version of Windows (such as Windows 7 or Windows XP) from the drop-down menu.
- Apply and Run:
Click Apply and then OK. Run the installer to see if the issue is resolved.
Step 11: Set the Installer’s Priority to High (Optional)
Allocating more system resources to the installer by setting its priority to high can prevent resource allocation issues during installation.
How to set the installer’s priority:
- Open Task Manager:
Press Ctrl + Shift + Esc to open Task Manager. - Locate the Installer Process:
Find the process corresponding to the game installer under the Processes tab. - Set Priority:
Right-click the process and choose Go to details.- In the Details tab, right-click the highlighted process.
- Select Set Priority and choose High.
Step 12: Run the Installer as Administrator
Running the installer with administrative privileges ensures it has full access to the system’s resources. This can help avoid permission-related issues that might block the installation process.
How to run as administrator:
- Right-Click the Installer:
Locate the game setup file, right-click on it, and select Run as administrator. - Confirm the Action:
If prompted by User Account Control (UAC), click Yes to allow the installer to run with elevated privileges.
This final step ensures that the installer operates with the highest level of access to the necessary system resources.
You May Like: Fixing DirectX Errors in Windows 11/10: Comprehensive Guide
Final Thoughts
Addressing the problems associated with the ISDone.dll error seems to be the aim behind these ordered and elaborated steps. The steps represent every conceivable angle from replacing and re-registering the critical DLL files to ensuring that memory and permission features of your system are perfect for the installation of games that take larger disks with memory. The following is the quick rehash of the ordered steps:
- Replace ISDone.dll and Unarc.dll Files (Visit DLLMe, download, extract, and copy to System32 and SysWOW64)
- Re-Register the ISDone.dll and Unarc.dll Files
- Install Missing Visual C++ Redistributables
- Run System File and Image Scans
- Increase Virtual Memory Allocation
- Temporarily Disable Antivirus
- Perform a Clean Boot Your PC
- Increase System RAM Capacity
- Perform a Memory Test
- Use Compatibility Mode
- Set the Installer’s Priority to High
- Run the Installer as Administrator
Good luck, and happy gaming!
ISDone.dll Error FAQ
Where is ISDone.dll located?
The ISDone dll file is normally located depending upon the type of your Windows Operating System. Thus, in case you are running a 32-bit OS then it will be found in the System32 folder. For 64-bit, however, this would go into the SysWOW64 folder within your File Explorer.
What is the Unarc DLL Error Code 11?
The great difficulty of the ISDone.dll error usually occurs when the Unarc.dll file in your System32 or SysWOW64 folder is either missing or damaged. In this scenario, your computer will fail to read installation archive files, leading to the occurrence of errors like ISDone.dll on launching certain applications or games.
Can I delete DLL files?
The successful performance of both your system and the different programs relies on the DLL files. Purging such files from the disk creates problems or sometimes complete breakage to the systems and applications and thus leads to other more serious issues.
How do I register DLL files?
Press Win + R to open the run dialog to register a DLL file. Type cmd and press Ctrl + Shift + Enter to bring up a Command Prompt with elevated permissions. In this Command Prompt, type regsvr32 dllname.dll (where “dllname.dll” would be replaced by your specific DLL name) and hit Enter.
What causes the ISDone.dll error, and how can I fix it?
The ISDone.dll error tends to be a result of insufficient memory (RAM) on a system or corrupted installation files, among other reasons. One of the simplest fixes is to carry out checks on one’s hardware, then follow the step-by-step guide to, for example, increase virtual memory, replace missing files, and finally optimize the system for the issue at hand.