Introduction
Highly pesky and problematic CPU and memory usage can easily divert attention in Windows 10 or Windows 11 when such activities are happening on your PC during a gaming or productivity session. Luckily, some simple steps could help fix these problems without installing new software. This guide explains simple troubleshooting steps to improve computer performance.
Steps to Fix High Memory and CPU Usage
Before The First Step: Modify Power Settings Using Command Prompt
- Open Command Prompt as Administrator (
Windows + S, type “cmd”, right-click, and select Run as Administrator). - Execute the following commands:
PowerCfg /SETACVALUEINDEX SCHEME_CURRENT SUB_PROCESSOR IDLEDISABLE 000Then The command:PowerCfg /SETACTIVE SCHEME_CURRENT
1. Disable SuperFetch or SysMain Service
- Access Services: Right-click on the Start icon and select “Run.” Type
services.mscand hit Enter. - Locate Service: Look for either “SuperFetch” or “SysMain.”
- Modify Settings:
- If “SuperFetch” is present, make sure it’s disabled. If not, find “SysMain.”
- Right-click on it, select “Stop,” then go to “Properties” and set the Startup type to “Disabled.”

1.2. Disable SuperFetch or SysMain Service With Registry Editor (Regedit)
1. Open Registry Editor
Press Windows Key + S, type Registry Editor or Regedit, and open it.
2. Navigate to Prefetch Parameters
Go to the following location in the Registry Editor:HKEY_LOCAL_MACHINE\SYSTEM\CurrentControlSet\Control\Session Manager\Memory Management\PrefetchParameters
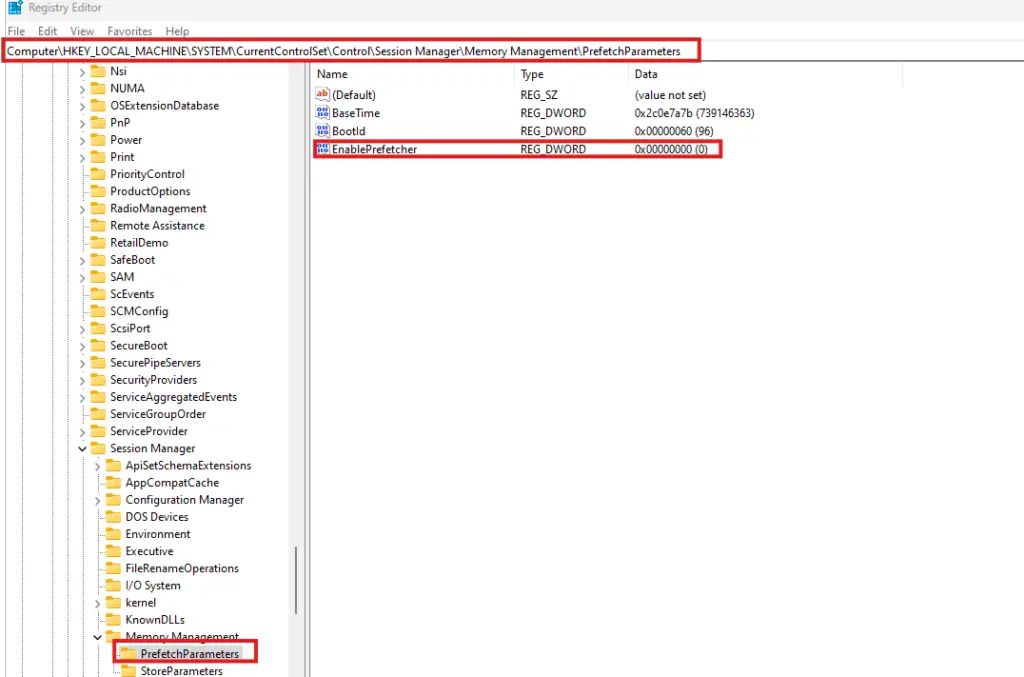
3. Set the Prefetch Mode
- Double-click on Enable Prefetcher.
- In the Value data field, choose one of the following settings:
0: Turn Prefetch off.1: Enable application launch prefetching.2: Enable boot prefetching.3: Enable both application launch and boot prefetching (default).
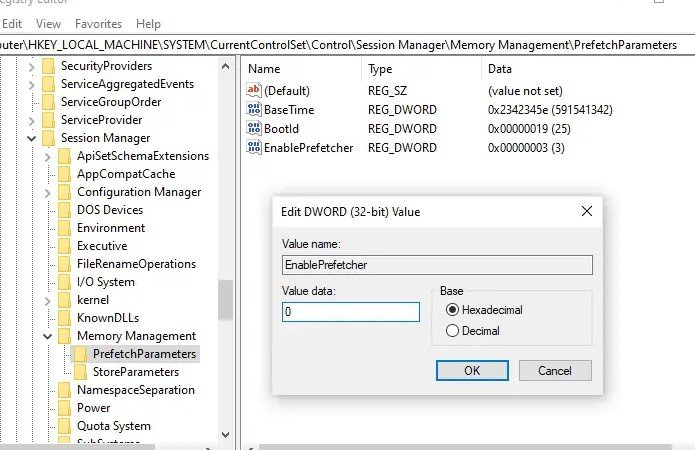
4. Apply Changes
Click OK to save your changes.
Prefetch Mode Details:
- 0: Disabled. No prefetching occurs.
- 1: Application launch prefetching improves app startup times.
- 2: Boot prefetching improves system boot speed.
- 3: Both app and boot prefetching enabled for optimal performance.
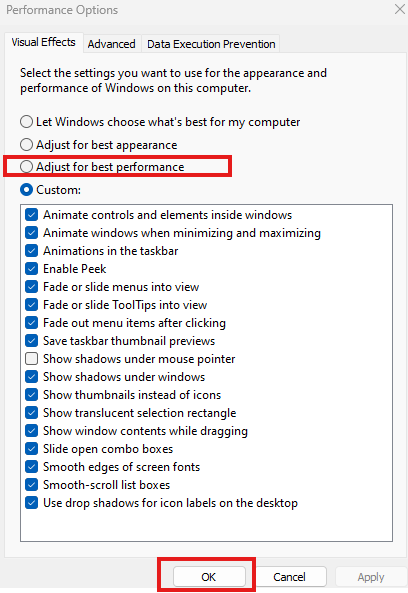
2. Optimize Visual Effects and Performance Settings
- Access System Properties: Right-click on the Start icon, go to “Run,” and type
sysdm.cpl. - Advanced Settings: Navigate to the “Advanced” tab and click on “Settings” under Performance.
- Adjust for Best Performance: Choose “Adjust for best performance” and then apply the changes.
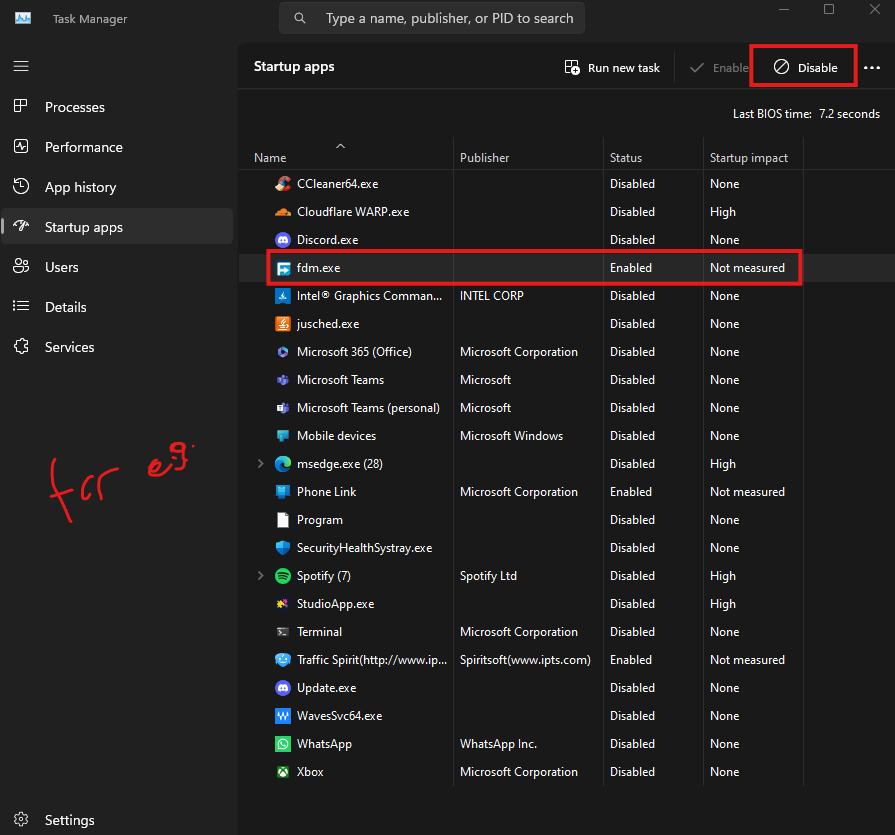
3. Manage Startup Programs
- Access Task Manager: Simply right-click on the taskbar and select “Task Manager” from the context menu that appears.
- Startup Tab: Select the “Startup” tab.
- Disable Unessential Programs: Identify and disable any of the programs that your computer does not need to start up, thereby reducing resource consumption at startup.
4. Free Up Disk Space
- Space Check Check Available Space: Open File Explorer and go to “This PC.”
- Ensure Proper Space: At least 25-50 GB should be on free space so it can perform extremely well. Clean the space by clearing Documents, Pictures, Downloads folders, etc. from unnecessary files.
You May Like: How to Fix Earphones and Headphones When Only One Side is Working: A Complete Guide
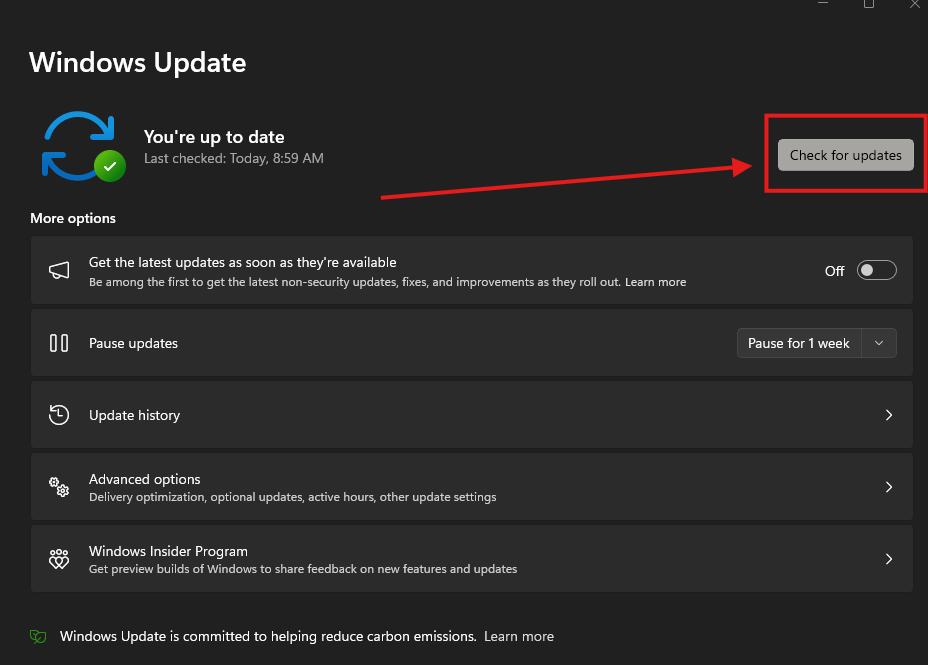
5. Update Windows
- Access Updates: Click on the magnifying glass icon and enter in “Windows Update”.
- Check for Updates: One should ensure their computer reflects up-to-date version of the software; thus enabling any performance improvements and bug fixes.
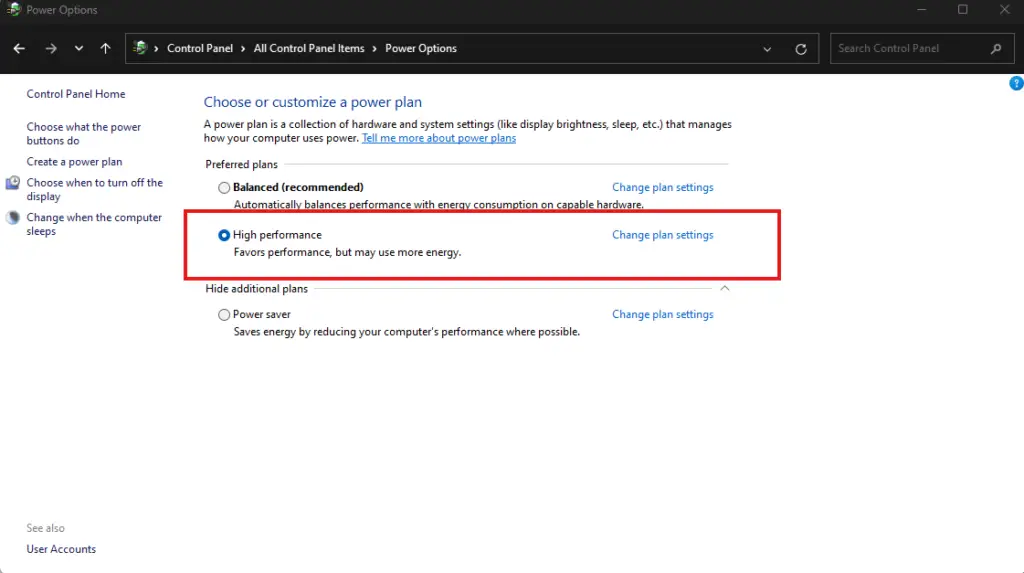
6. Set Power Plan
- Select Power Plan: Search for “Power” in the Windows search bar or “Edit Power Plan” then click in the tab before to go to power options or just put this on the folder search bar “Control Panel\All Control Panel Items\Power Options” then enter and select “Choose a power plan.”
- Choose High Performance: If “High Performance” is not visible, create a new power plan ensuring it is set to optimize performance over visual effects.
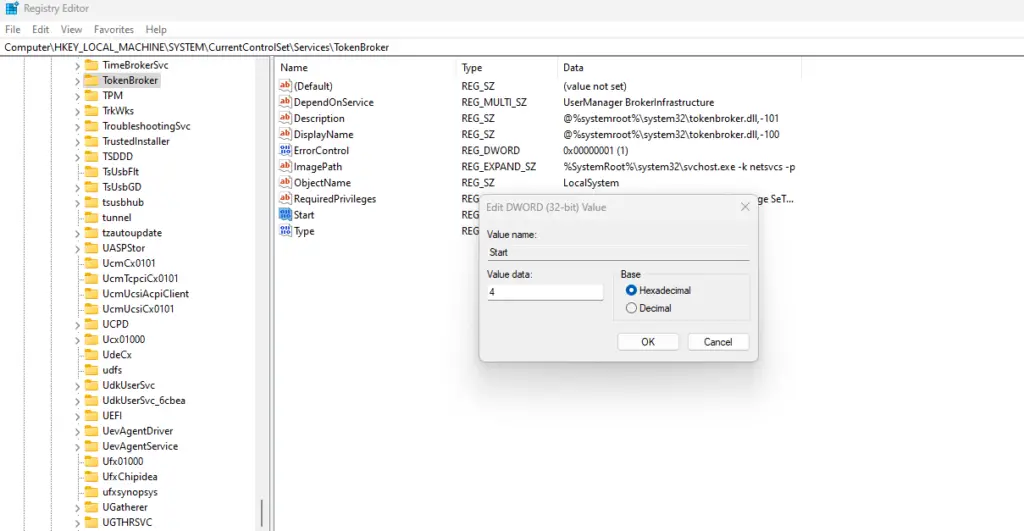
7. Change The Value of TokenBroker (Start)
1. Open Registry Editor
Press Windows Key + S, type Registry Editor or Regedit, and open it.
2. Navigate to Prefetch Parameters
- Go to the following location in the Registry Editor:
HKEY_LOCAL_MACHINE\SYSTEM\CurrentControlSet\Services\TokenBroker - Double-click Start on the right pane then change the value from
3to4.
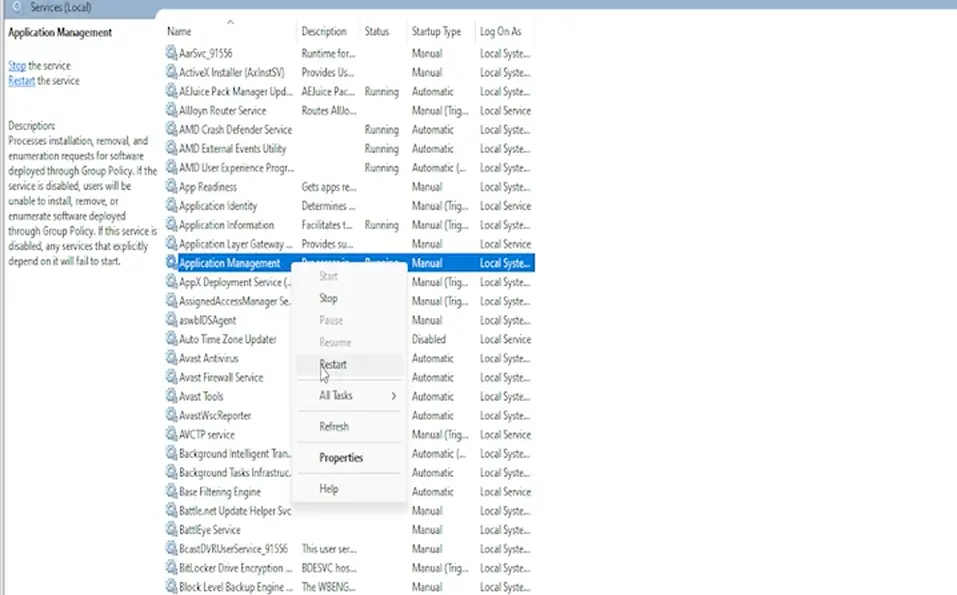
8. Restart Application Management In service
Press Windows Key + R, type services.msc or search services , and open it.
Locate ‘Application Management,’ and if it is turned off, switch it on. Then, restart it. Afterward, turn it off again.
9. Disk Cleanup
- Access Disk Cleanup: Right-click, go to “Run,” and type
cleanmgr. - Select Drives: Choose your C drive and select all items to clean, especially cache files and temporary files.
10. Delete Temporary Files
- Access Temp Folder: Press “Run” again, type
temp, and select all files to delete. - Repeat for Percentage Temp: Do the same for
%temp%to ensure complete junk removal.
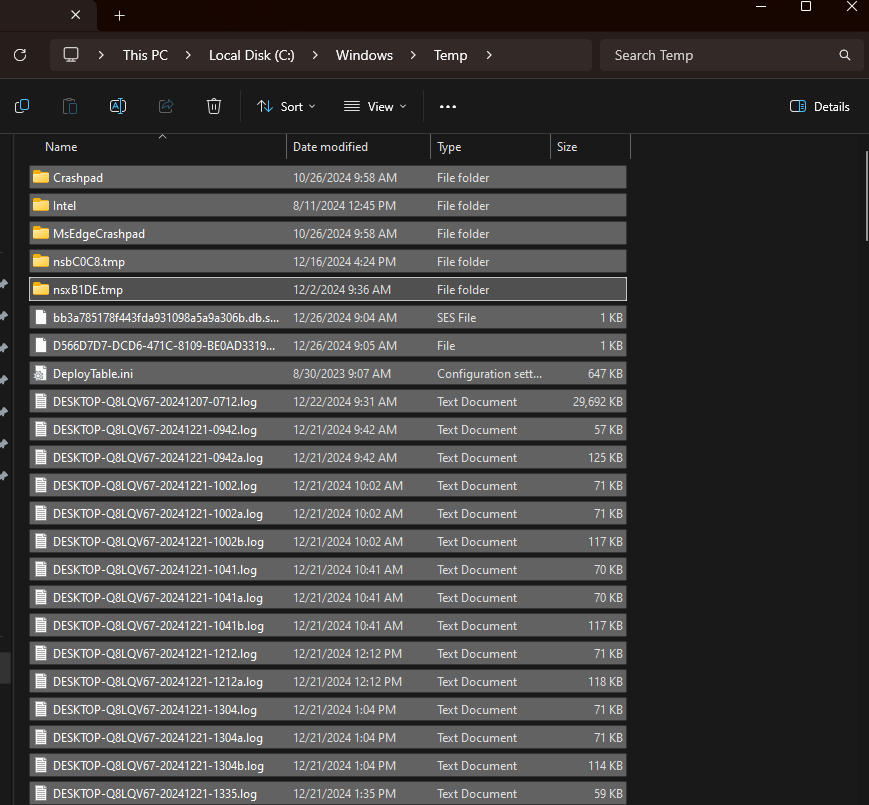
temp, and select all files to delete.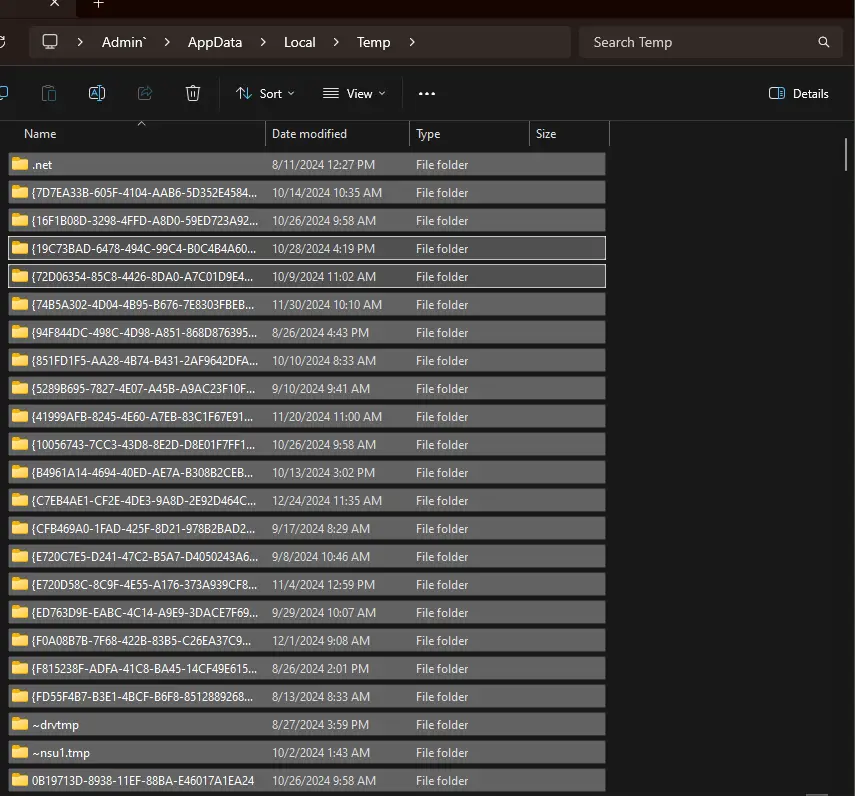
%temp% to ensure complete junk removal.11. Restart Your Computer
Restart After Modifications Make sure to restart your computer to apply all the changes effectively.
12. Run Full Virus Scan
- Access Windows Security: Click on the shield icon in the system tray.
- Scan for Threats: Go to “Virus & threat protection,” select “Scan options,” and choose “Full scan.” Schedule this scan monthly to maintain a clean system.
You May Like: How To Fix Packet Loss: Causes, Effects, and Fixes 2025/2024
Lastly
These simple steps would improve your Windows 10 or even Windows 11 computer performance very much if it has been experiencing high memory and CPU usage. Regular implementation of these techniques would lead to better results; remember to keep your system clean and updated!