Screenshots and recordings of the screen become an essential part of documentation for sharing and troubleshooting in this digital world. It may involve capturing something from the web, showing a problem, or creating a visual manual. You should know how to maximize all of Windows’ screenshot and screen capture features for your convenience and effectivity. There are different methods of capturing images on screen, from the best bet to additional tips in this guide that will help in optimizing your screen capture workflow.
Why Take Screenshots on Windows?
With screenshots and screen recordings, you can:
- Capture evidence such as receipts, error messages, or important information.
- Convert a workflow into step-by-step instructions.
- Preserve ephemeral online material such as social media artifacts.
- Add images to presentations, guides, or reports.
Method 1: Using the Print Screen (PrtSc) Key
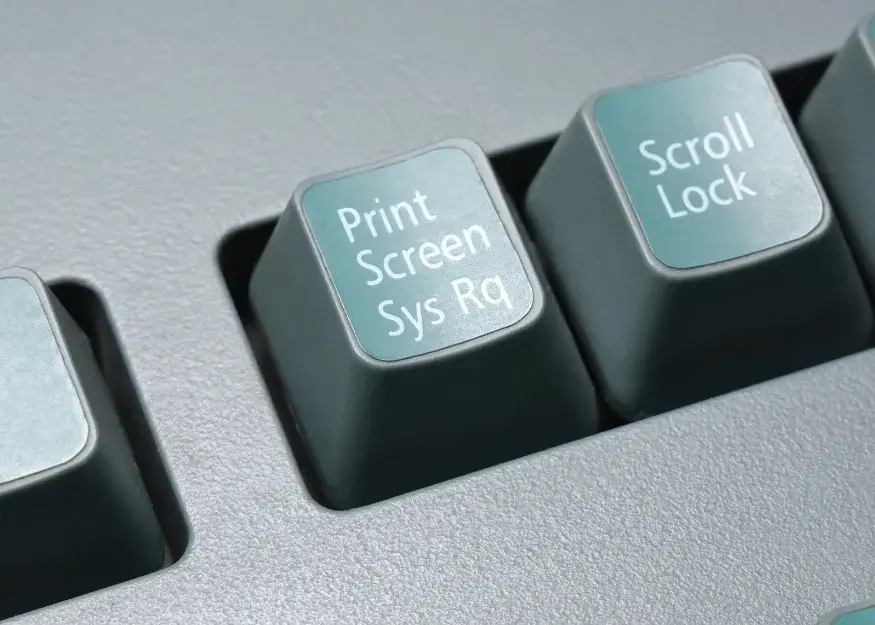
The Print Screen button is the easiest one to use on Windows when you want to take a screenshot.
Full-Screen Capture
- Press the PrtSc key to copy the entire screen to your clipboard.
- Open an app like Microsoft Paint and paste using Ctrl + V.
- Save the image in your preferred format (e.g., PNG for clarity).

Active Window Capture
- Focus on the window you want to capture.
- Press Alt + PrtSc to copy the active window to your clipboard.
- Paste and save as needed.
Tip: On some devices, you might need to press Fn + PrtSc.
Method 2: Windows + Print Screen Shortcut
For automatic saving:
- Press Windows Key + PrtSc together.
- The screen will dim briefly, confirming the capture.
- Find the saved image in the Pictures > Screenshots folder.
You May Need: How to Fix Windows Key Not Working on Windows 10 and 11 in 2024
Method 3: Snipping Tool
Flexible internal options for taking the necessary screenshots are included with the Snipping Tool.
- Search for “Snipping Tool” in the Start menu.
- Open the app and select “New.”
- Choose from the following snip types:
- Rectangular Snip: Capture a rectangular area.
- Free-form Snip: Draw any shape for capture.
- Window Snip: Capture a specific window.
- Full-screen Snip: Capture the entire screen.
- Save or annotate your screenshot.
Tip: Use the annotation tools for clarity and emphasis.
Method 4: Snip & Sketch (Windows 10 and 11)
Snip And Sketch can act as modem replacement over Snipping Tool, with advanced functionalities in editing.
- Press Windows Key + Shift + S to launch the Snip & Sketch toolbar.
- Select your capture mode:
- Rectangular Snip
- Free-form Snip
- Window Snip
- Full-screen Snip
- After capturing, click the notification to edit and save your snip.
Pro Tip: Use Snip & Sketch’s tools like the ruler and highlighter for precision.
Method 5: Xbox Game Bar for Screen Recording
The Xbox Game Bar is really for recording any gameplays or activities in an application.
- Open the Xbox Game Bar with Windows Key + G.
- Click the Capture widget.
- Press Windows Key + Alt + R to start recording.
- Stop recording with the same shortcut or the stop button.
- Find recordings in the Videos > Captures folder.

Note: Xbox Game Bar doesn’t record desktop or File Explorer.
Method 6: Third-Party Applications
For advanced functionality, consider using tools like Snagit, Greenshot, or even ShareX.
- Snagit: High-quality captures with video recording and editing tools.
- Greenshot: Lightweight, open-source, and annotation-friendly.
- ShareX: Free with extensive options, including scrolling captures.
Screenshot Tools
| Method | Best For | Key Features | Limitations |
|---|---|---|---|
| Print Screen | Quick full-screen captures | Built-in, no setup required | Requires manual pasting and saving |
| Windows + PrtSc | Automatic saving | No manual steps, saves to Screenshots folder | Limited editing options |
| Snipping Tool | Specific area captures | Flexible snip types, basic editing | Manual saving required |
| Snip & Sketch | Annotated screenshots | Modern interface, annotation tools | Notification-dependent workflow |
| Xbox Game Bar | Screen recording | Built-in, easy to use | Limited to app recording |
| Third-Party Applications | Advanced features like scrolling capture | Enhanced editing, cloud integration | Requires installation |
Best Practices for Screenshots
To create professional and effective screenshots:
Prepare Your Screen:
- Close irrelevant windows.
- Hide sensitive information.
Optimize Display Settings:
- Adjust brightness for visibility.
- Use native resolution for clarity.
Organize Files:
- Use descriptive names.
- Group related captures in folders.
Maintain Quality:
- Save images in PNG format for high resolution.
- Avoid unnecessary compression.
Annotate Thoughtfully:
- Highlight key areas.
- Use arrows or text to add context.
Troubleshooting Common Issues
Print Screen Key Not Working
- Check if Fn Lock is enabled.
- Update keyboard drivers.
- Use alternative shortcuts (e.g., Fn + PrtSc).

Screenshots Not Saving
- Default saving location checks.
- Space Check Storage.
- Folder Access Permission Check.
Blurry Screenshots
- Display resolution must be in harmony with native resolution of monitor.
- Save as PNG format for higher clarity.
You will be able to acquire and share content without any hassles from any Windows devices with these techniques. Work, study, or personal life- every activity has its own applications and methods for deriving polished professional results.


