We all have been there, trying to install a software or game on our PC and receive a dreaded error message stating that there is a missing runtime library or software component. Sometimes it can be devastating, particularly when one is clueless about runtime or its purpose.
In this text, we will furnish you with a step-by-step instruction to bring the runtime library and supporting software on board to help you fix these problems, so that your system runs as good as new again. Be it for gamers encountering DirectX failures or application readers getting .NET framework component missing screen. This article will lead you through the download and installation and repair of all the standalone runtime libraries and software you might need.
By the time you are through with it, all the runtimes would have been updated, your system optimized a great deal, and bugs a thing of the past! Let’s walk you through installing the runtimes you’ll need to avoid those error messages.
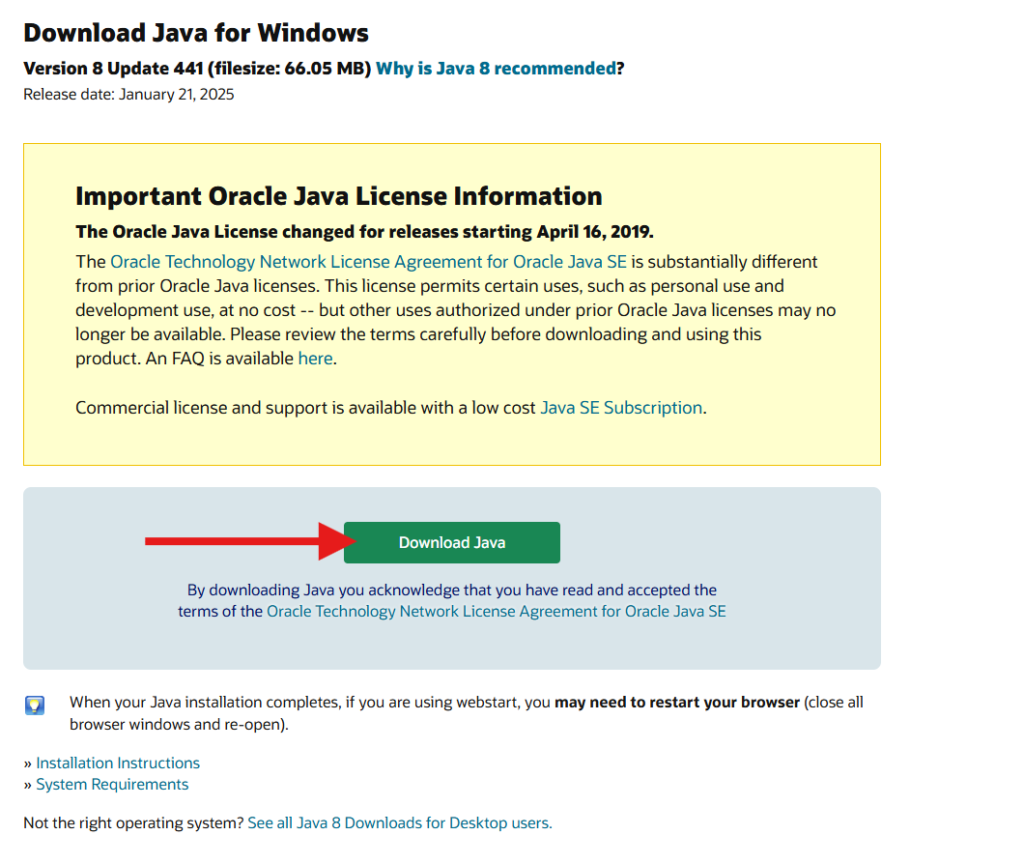
Step 1: Downloading the Latest Version of Java
Java is one of the most widely-used runtimes for executing applications mainly those from an older or legacy line. It is also one of the must-know-technology sets if you want to have a future in any programming language. Why Java? Java Runtime Environment (JRE) or Java Development Kit (JDK) is the assurance that a Java-based application an run effectively on your system; otherwise, you may encounter errors and compatibility issues from using the wrong Java version.
How to Download:
- Visit the official Oracle website for Java.
- Make sure to download the latest JRE/JDK version compatible with your system.
Installation Instructions:
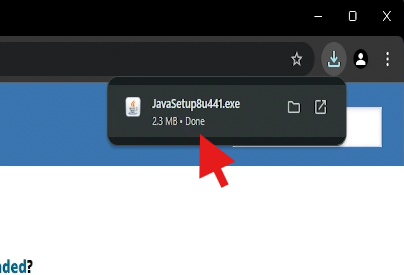
- Download the JRE or JDK installer from Oracle’s official page.
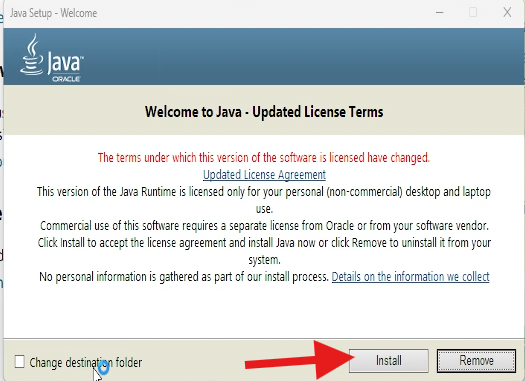
- Run the installer.
- Click Yes if a window shows up then click install.
- Optionally: configure the JAVA_HOME environment variable (important for developers).
- Optionally: To verify Java is installed correctly, open Command Prompt (Windows) or Terminal (Linux/macOS) and type
java -version.
You May Like: Is Disposable 10-Minute Mail Trackable? Exploring the Myths and Realities In 2025
Step 2: Downloading Visual C++ Redistributable Runtimes (All-in-One)
Visual C++ Redistributable packages install libraries that are required to run certain applications developed with Visual C++.
Why Visual C++ Redistributables?
Many applications, including popular games and utilities, depend on the Visual C++ Redistributable packages to run. Installing the correct versions of these runtimes ensures that these programs can function as expected without errors.
How to Download:
- Visit TechPowerUp’s Visual C++ Redistributable All-in-One package.
- Choose the version based on your system’s architecture (x86 for 32-bit systems, x64 for 64-bit systems).

Installation Instructions:
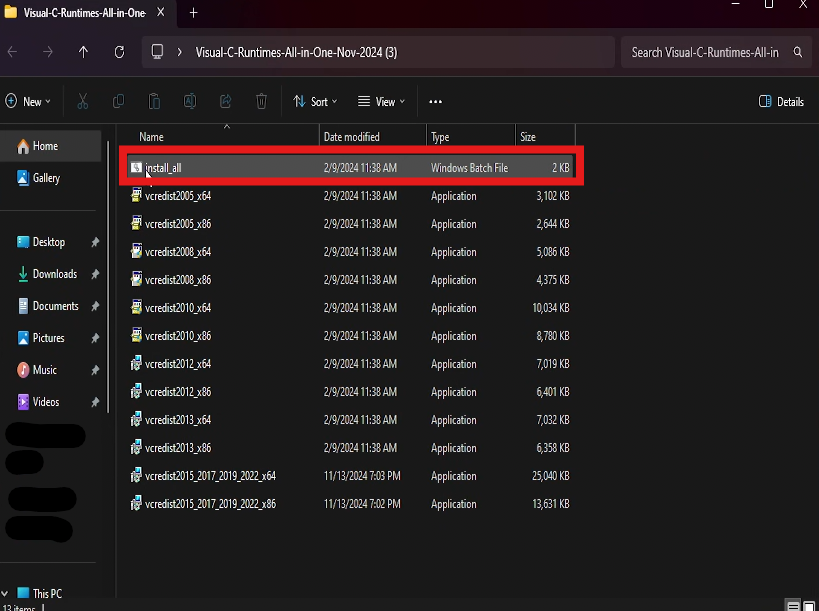
- Download the all-in-one package and extract it to a folder.
- Inside the folder, run the
.batfile to install all required redistributables in one go. - Wait for the installation process to complete (You should click “Yes” whenever the window appears so that the installation can proceed), then reboot your system if prompted.
Troubleshooting Tips:
- If any of the redistributables fail to install, try running the installer as an administrator.
- You may need to install individually if it doesn’t works from intsall_all.bat.
Step 3: Download DirectX 2010 Offline Installer
DirectX is crucial for rendering multimedia content, especially for games. Many programs rely on older versions of DirectX, such as DirectX 2010, which may not be included in the latest updates.
Why DirectX 2010?
This version is often necessary for older games and applications that haven’t been updated to work with DirectX 12.
How to Download:
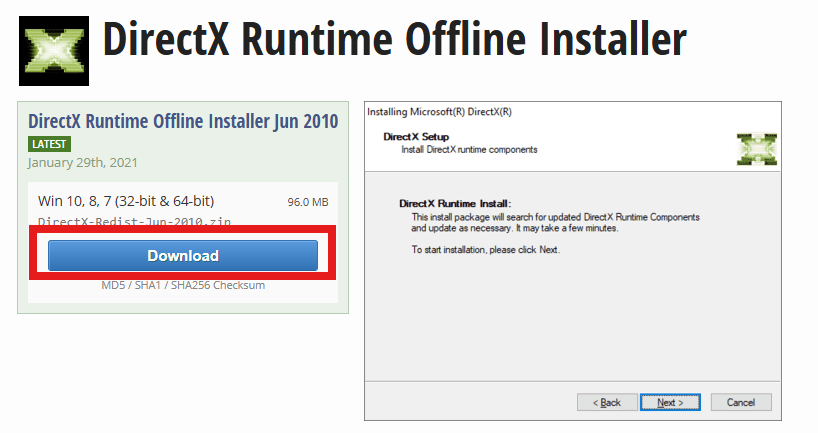
- Visit a reputable source like Microsoft’s DirectX 2010 Offline Installer From TechPowerUp.
- Download the DirectX 2010 offline installer for your system.
Installation Instructions:
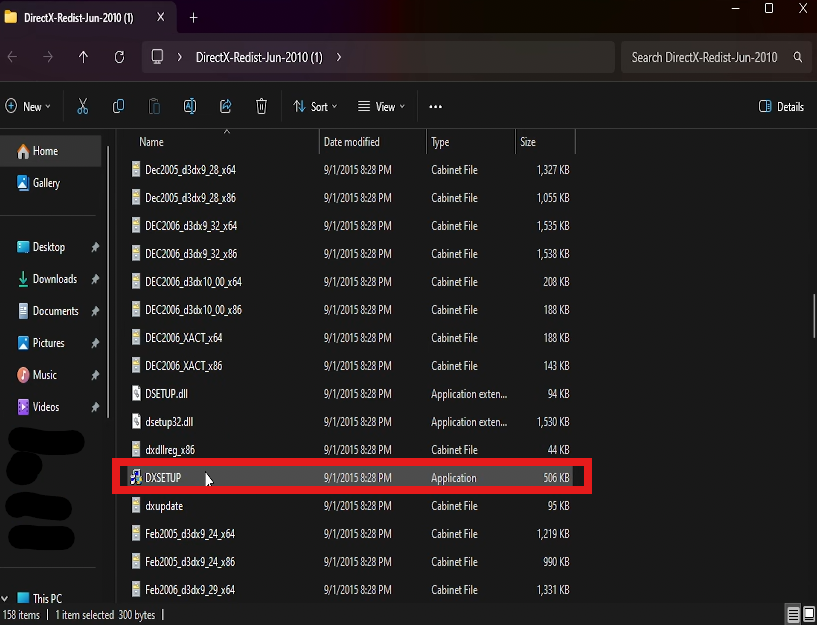
- Extract the files and run
dxsetupto begin the installation. - Follow the on-screen instructions and click “Next” until the installation completes.
You May Like: How to Update and Enhance Internet Speed and Ping Using TCP Optimizer: A Step-by-Step Guide for a Faster Web Experience! 2025
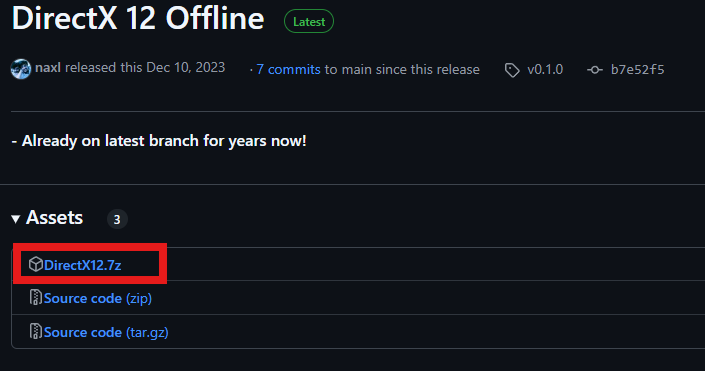
Step 4: Download DirectX 12 Offline Version
DirectX 12 introduces new features that dramatically improve performance and quality in gaming and multimedia applications.
Why DirectX 12?
If you’re running newer games or applications, you’ll need DirectX 12 for the best performance. Many modern applications depend on it for enhanced graphics and optimization.
How to Download:
- Go to Github Naxl/Directx12.
- Download the offline installer.
Installation Instructions:
- Extract the file, then run the setup executable (
dxsetup). - Follow the prompts, clicking “Next” until installation completes.
Step 5: Installing DirectX Web Version
The DirectX Web Installer is another method to get DirectX updates, but it’s designed to install the best version of DirectX for your system based on hardware compatibility.
Why DirectX Web Installer?
It automatically downloads and installs the most suitable version of DirectX for your system.
How to Download:
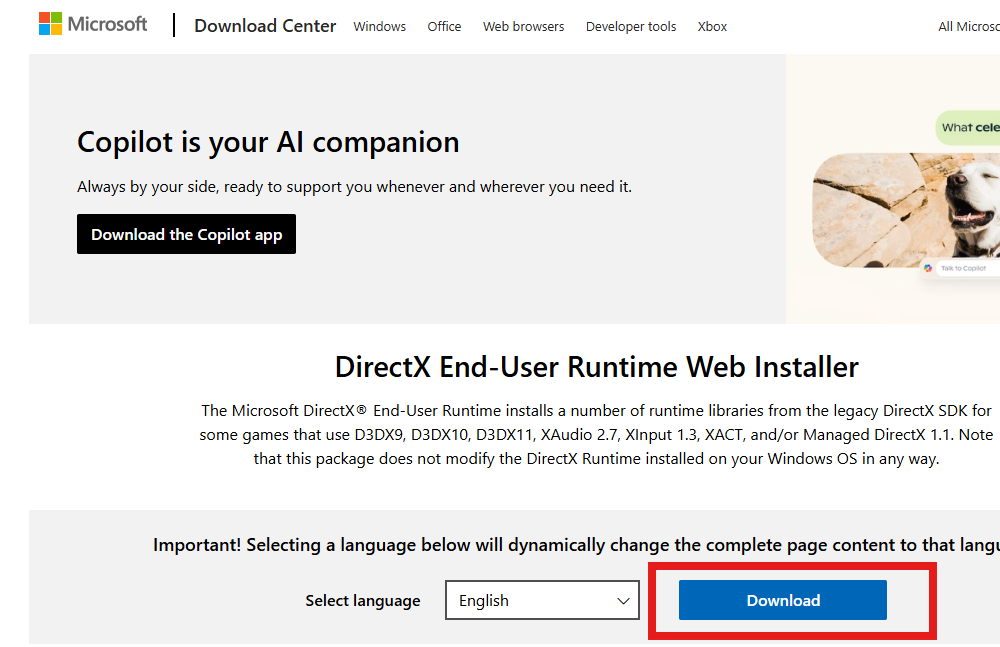
Installation Instructions:
- Run the web installer.
- The installer will automatically check your system and download the necessary updates.
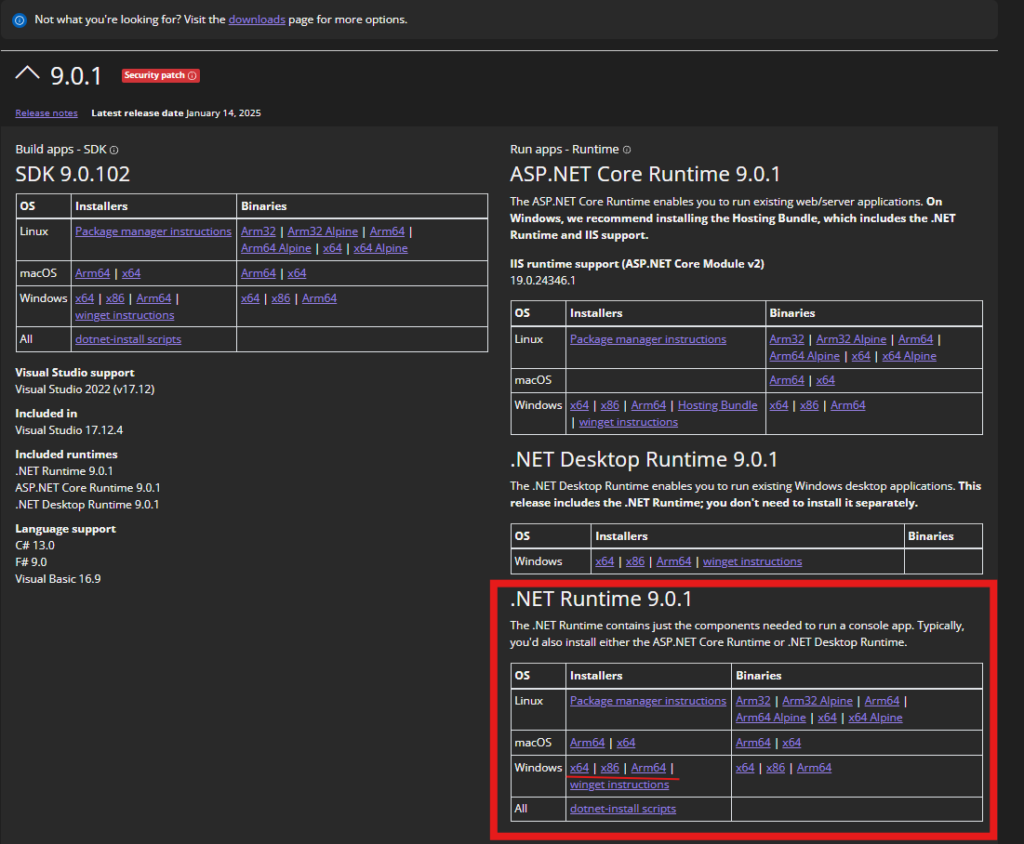
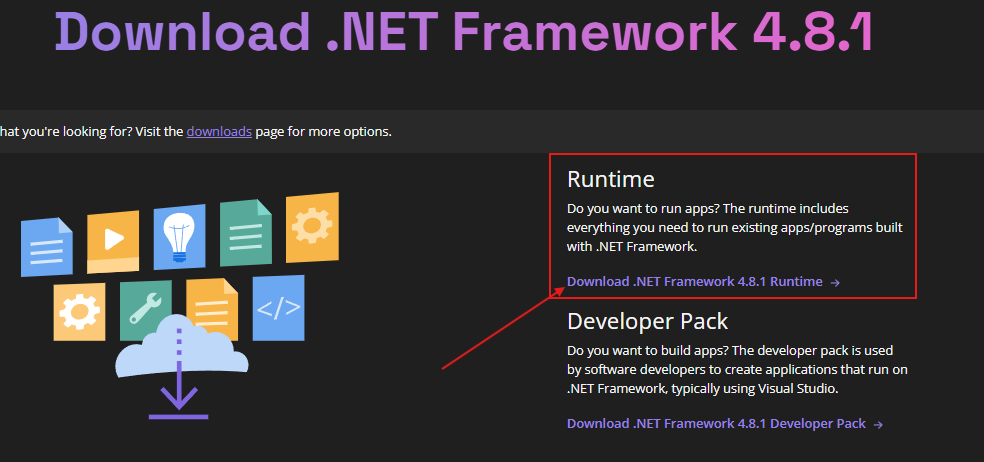
Step 6: Installing .NET Framework 9.0 Runtime
The .NET Framework is another critical piece of software for running many Windows applications.
How to Download:
- Head to the official Microsoft .NET Framework 9.0 download page.
- Download the latest version of the .NET Framework (64-bit) if your Windows system is 64-bit, or download the x86 version if your Windows system is 32-bit.
Installation Instructions:
- Download the installer and run it.
- Follow the installation prompts until the process is complete.
You May Like: How To Fix Packet Loss: Causes, Effects, and Fixes 2025/2024
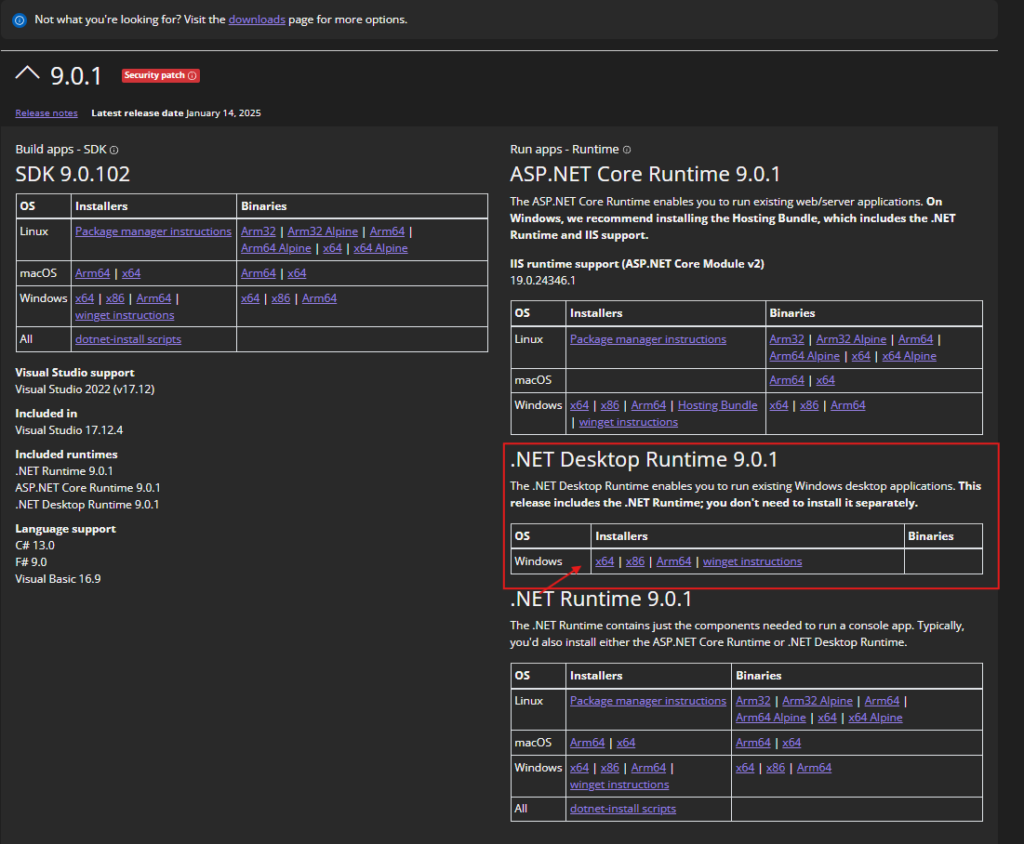
Step 7: Installing .NET Desktop Runtime 9.0
The .NET Desktop Runtime allows your system to run Windows desktop applications built using .NET. This runtime is essential for many modern desktop applications.
How to Download:
- Visit the official Microsoft .NET Desktop Runtime download page.
- Select the appropriate version of .NET Desktop Runtime 9.0 for your operating system (Windows).
- Download the installer file.
Installation Instructions:
Once the download completes, locate the installer file (typically named something like dotnet-runtime-9.0.xxxx-win-x64.exe).
- Run the Installer: Double-click on the installer to begin the process.
- User Account Control Prompt: If prompted by User Account Control (UAC), click “Yes” to allow the app to make changes to your device.
- Install the Runtime: The installer will guide you through the process:
- Click “Next” on the welcome screen.
- Accept the License Agreement by selecting “I accept the license terms” and then click “Next.”
- Choose the installation location, or leave it at the default. Click “Install.”
- Wait for the Installation to Complete: The installer will copy necessary files to your system. This may take a few minutes.
- Finish the Installation: Once the installation is complete, click “Finish” to exit the installer.
- Restart Your Computer: While a restart may not always be required, it’s recommended to reboot your system to ensure the runtime is fully integrated.
Troubleshooting Tips:
- If you receive an error stating that the version already exists, check your current .NET version by running
dotnet --list-runtimesin the Command Prompt (Windows). - If the installation fails, make sure your system is up-to-date and that no other .NET installations are in conflict with the new one.
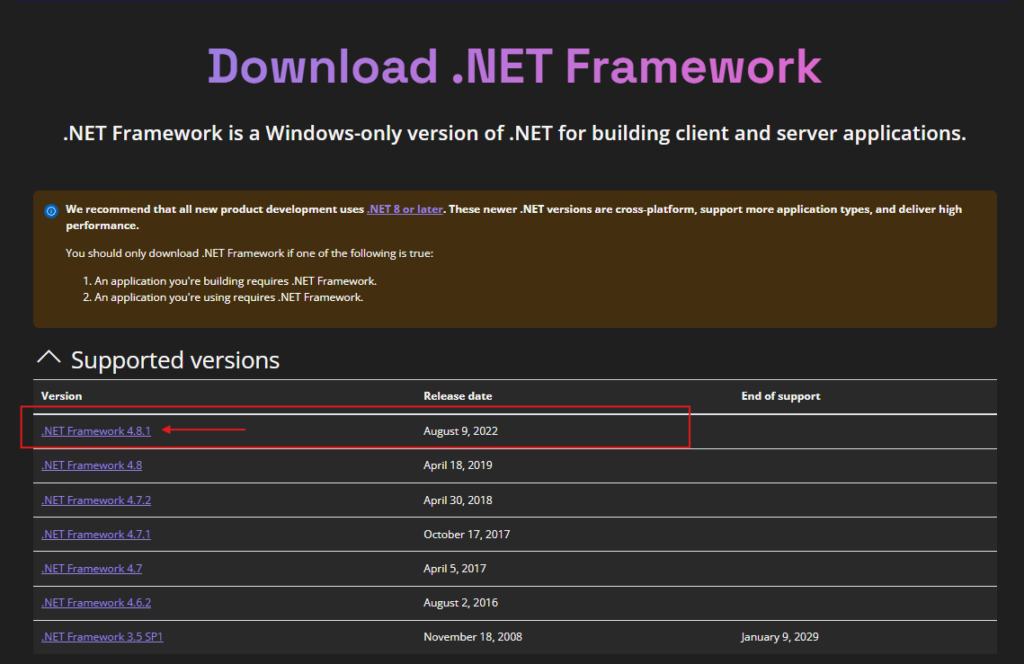
Step 8: Installing the Latest .NET Framework (v4.8 at Time of Writing)
.NET Framework 4.8 is the latest stable version and supports a wide range of applications, including those built with earlier versions of the .NET Framework.
How to Download:
- Visit the official Microsoft .NET Framework download page.
- Find the .NET Framework 4.8 version and click on the download link for your system (usually a
.exefile).
Installation Instructions:
- Download the Installer: Once the download completes, open the folder where the installer is saved (e.g.,
NDP48-x86-x64-AllOS-ENU.exe). - Run the Installer: Double-click on the installer to begin the installation process.
- User Account Control (UAC): If prompted by UAC, click “Yes” to allow the installer to make changes to your device.
- Installation Wizard: The .NET Framework installer will begin. Follow the on-screen instructions:
- Accept the License Agreement by clicking “I agree.”
- The installer will automatically check your system for prerequisites and update any necessary files.
- Wait for Installation: The installation may take several minutes. You’ll see progress bars as files are installed.
- Reboot Your System: Once installation is complete, you will be prompted to restart your computer. Click “Restart Now” if you wish to reboot immediately, or restart manually later.
- Verify Installation: Once your system reboots, you can verify the installation by opening the “Programs and Features” list in the Control Panel. You should see “Microsoft .NET Framework 4.8” listed there.
Troubleshooting Tips:
- If you encounter an error saying a previous version is already installed, check the system for updates to make sure your system is fully updated before attempting again.
- Make sure you have the latest Windows updates installed, as some .NET Framework versions rely on specific OS updates.
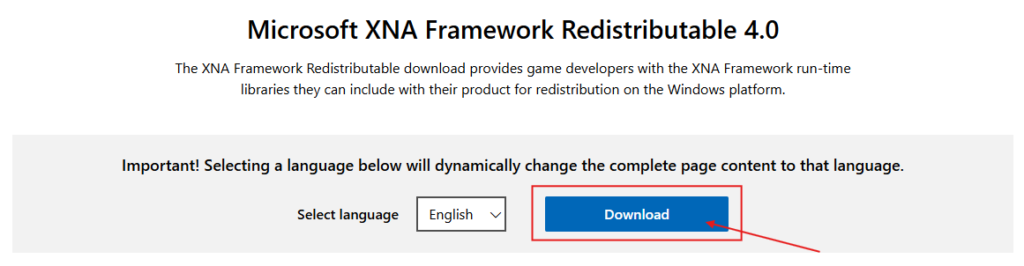
Step 9: Downloading and Installing Microsoft XNA Framework
The XNA Framework is required to run certain legacy games and applications, as it provides a set of managed libraries to help with graphics, audio, and game development.
How to Download:
- Visit the official Microsoft XNA Framework download page.
- Click on “Download” to download the installer for the framework.
Installation Instructions:
- Download the XNA Framework Installer: After clicking the download link, the installer file will be saved to your computer (e.g.,
XNARuntime.msi). - Run the Installer: Double-click on the
.msiinstaller to begin the installation. - User Account Control (UAC): If prompted by UAC, click “Yes” to allow the installer to make changes to your computer.
- Installation Wizard: The XNA Framework installer will open:
- Click “Next” to continue.
- Accept the License Agreement by checking the box and clicking “Next.”
- Choose the installation directory or leave it as the default and click “Next.”
- Install: The installer will begin copying necessary files to your system. This process usually takes just a few moments.
- Complete the Installation: After installation is complete, click “Finish” to exit the installer.
- Restart Your Computer: If necessary, restart your system to finalize the installation.
Troubleshooting Tips:
- If you encounter issues running games or apps using XNA Framework, ensure you have installed the correct version and check for any software updates.
- Older games may require compatibility modes. Right-click the game executable and select “Properties” > “Compatibility” to run the game in an earlier version of Windows if needed.
You May Like: What Is VRAM? and How It Affects Graphics Performance
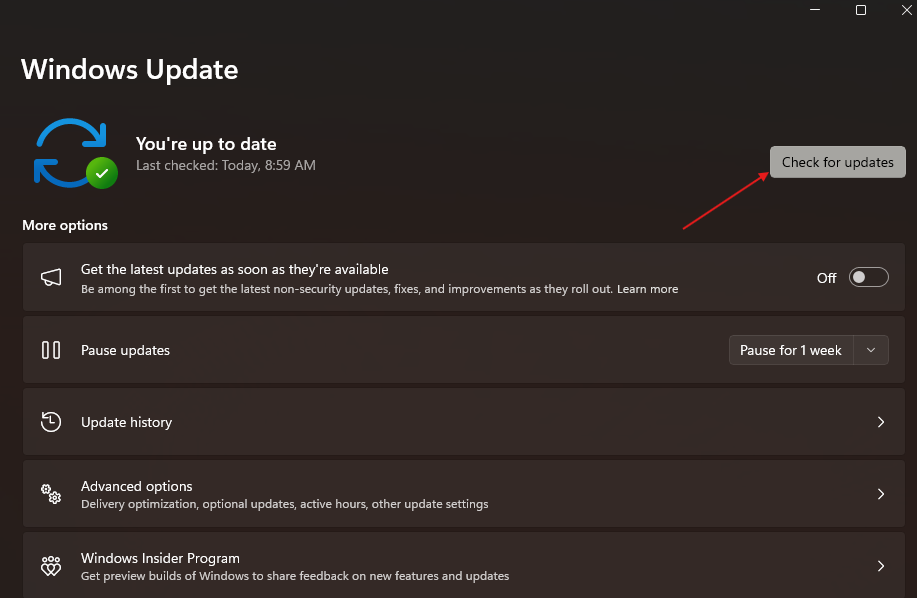
Step 10: Updating Windows
Keeping your Windows system updated is crucial for both security and performance.
How to Check for Updates:
- Open Settings > Update & Security.
- Click “Check for Updates.”
- Install any available updates, especially critical ones that could fix bugs with runtimes.
Step 11: Updating GPU Drivers (NVIDIA & AMD)
Updating your GPU drivers ensures that your graphics card operates optimally and is compatible with the latest applications and games.
NVIDIA Drivers – Updating via GeForce Experience
- Download and Install GeForce Experience (If Not Already Installed):
- Visit the official NVIDIA GeForce Experience download page.
- Click “Download Now” and follow the on-screen instructions to install the application.
- Open GeForce Experience:
- Once installed, open GeForce Experience from the Start Menu or by searching for it.
- Sign in or create an account (optional but useful for driver management).
- Check for Driver Updates:
- In the main window of GeForce Experience, navigate to the “Drivers” tab.
- Click on “Check for Updates” to search for the latest available driver for your GPU.
- Download and Install the Driver:
- If a new driver version is available, you will see an “Update” button next to the driver name.
- Click “Download” and wait for the driver to download.
- Once downloaded, you’ll be prompted to install it. Choose “Express Installation” for an easy setup, or “Custom Installation” if you want to select specific driver components.
- Complete Installation and Restart:
- After installation completes, restart your computer to ensure the new driver is fully integrated.
Troubleshooting Tips:
- If you run into issues, try using the “Clean Installation” option during the installation process to remove old drivers and settings.
- If GeForce Experience doesn’t detect the driver update, try visiting the NVIDIA Driver Download page and manually downloading the latest version.
AMD Drivers – Updating via AMD Radeon Software (Adrenalin)
- Download and Install AMD Radeon Software (If Not Already Installed):
- Visit the AMD Radeon Software page and download the latest version of the Radeon Software Adrenalin.
- Run the installer and follow the instructions to install the software.
- Open AMD Radeon Software:
- After installation, open the AMD Radeon Software from the Start Menu or by searching for it.
- After installation, open the AMD Radeon Software from the Start Menu or by searching for it.
- Check for Driver Updates:
- In the Radeon Software window, go to the “Home” tab.
- Look for an option that says “Check for Updates” under the “Driver & Software” section.
- Download and Install the Driver:
- If a newer version is available, it will be displayed in the app. Click “Download” to get the latest driver.
- Once downloaded, the software will automatically begin the installation process.
- Follow the on-screen instructions. You can choose “Express” installation or “Custom” to select which components to install.
- Restart Your Computer:
- After the installation is complete, restart your system to ensure the new driver is applied.
Bottom Line
Brilliant! At this point, every last action for bringing the system with the very recent runtimes and software to an updated status has been successfully taken. From Mesa3D to DirectX updates and the .NET Framework, all the tools mentioned will improve compatibility and performance; now, your programs and games should launch perfectly.
Hence, remember to work hard toward keeping your system updated through regular updates so that all the bugs will go away immediately, and this guide may come in handy whenever you run into any new problem. So there you go! Happy computing!
By clicking the button below, you will be instantly redirected to MediaFire, where you can download the file.